You can configure any device via its configuration dialog window, which can be accessed several ways:
- After creating a new device, the configuration options will be shown automatically.
- Hovering your mouse cursor over a device in the Finder and clicking the ‘Edit’ button that appears to the right.
- Opening a device in the main tab bar and clicking Device Configuration in the bottom right of the screen.
Typically, when you add a new device, no monitoring will take place until you complete some minimum configuration steps, such as defining a network address to monitor, or by installing the NiTO agent. This gives you a chance to configure all the available parameters and alarms before any metrics are collected and alerted for.
Device-specific Options
Depending on the type of device, different options will be available on the device’s configuration dialog window, i.e., the agent configuration dialog includes sections for ‘Extensions’ and ‘Agent Management’ which are not applicable nor visible for any other type of device. Likewise, a URL field will be listed under the Basic Properties section of an HTTP(S) check which is not applicable nor visible for agents.
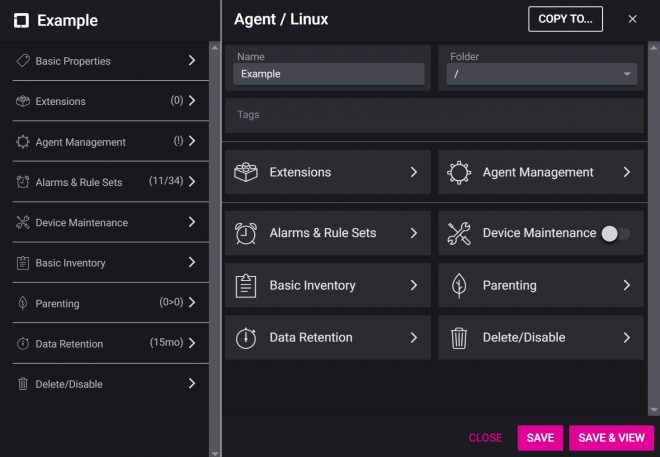
Common Device Options
- Basic Properties, such as the name of the device, it’s folder, and minimum required parameters depending on the device type (e.g., URL)
- Alarms & Rule Sets
- Device Maintenance
- Basic Inventory
- Parenting
- Data Retention
- Disable/Delete
A device will begin monitoring as soon as you’ve configured the minimum required parameters and click ‘Save’. To save and view the device metrics, click ‘Save & View’