Sometimes you don’t notice a critical notification that you received, sometimes you don’t receive a critical notification for something you should have. There are several places within NiTO that define when, why and how you’ll get alerted. Configuring these section appropriately is crucial for effective monitoring.
When you don’t receive an alert notification for something that you expected to, there are a few places you should check to ensure that you’re actually scheduled to receive that type notification in the first place. For example, all users except for one may be getting ‘Warning’ alerts for a specific problem; this would likely indicate that ‘Warnings’ are enabled at the Rule Set level, but ‘Warnings’ are disabled for that one user in question.
- Rule Set: Under Finder, choose the folder which contain the device(s) in question, then choose the Policy near the top right of the Finder. Click ‘Edit’ on any Rule Set associated with the device(s), then Notification Schedule. Examine the contacts, the scheduled times and severity levels configured.
- User: Under Admin, go to Users, then choose the user(s) in question. Under Notification Schedule, examine the notification methods, scheduled times and severity levels configured.
- Alarm: Go to the Alarms section via the Rule Set or Device(s) configuration popover. Edit the alarm(s) in question and verify that notifications are enabled for the appropriate severity levels.
- Maintenance: Check the maintenance schedule for the device(s) in question, which may be set per Device, per Folder or per Alarm. A maintenance schedule prevents alerts from being generated within its scope (not just the notification).
Notification Calendar
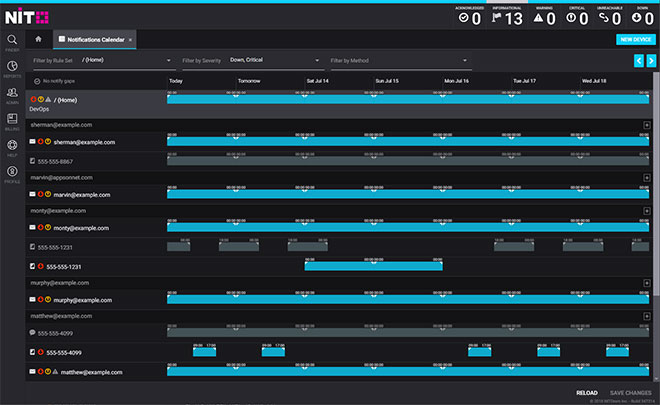
Under Reports and various Notification Schedule sections, you’ll be able to access the ‘Notifications Calendar’. This gives you a general overview of which Rule Sets and Users are scheduled to receive alerts. Notification-gaps will be highlighted in red, and you quickly edit time slots by drag-and-drop for the the listed Rule Sets and Users.
